How to use the overview feature in Time Clock?
Once you logged in to your HR Cloud account, click on Time Clock under Applications on the left side as shown below:
- In Time Clock you can see Clock in option and an overview of clocked, regular, overtime and billable hours in the current month. You’ll also see Recent 5 pay periods.
- You can access Calendar and choose which month you want to be showcased by clicking on the green arrows on the left and right side of the month name. This overview will let you see enough hours, any overtime, missing hours, and your time off by color indication.
How to Clock in and Clock out?
To clock in, click on the “Clock in” button next to your name on the top of the page.
That will set the timer on, and the “Clock in” button will be replaced with a similar “Clock out” one. Click on it when your shift ends. Your working hours will be shown below the button.
After you clock out, the Clock In button will appear again and you can repeat the process tomorrow or, if necessary, even the same day. Clocked hours will be updated automatically so you can have a clear overview. You don’t have to refresh the page or leave the application.
How to access My Time Sheet?
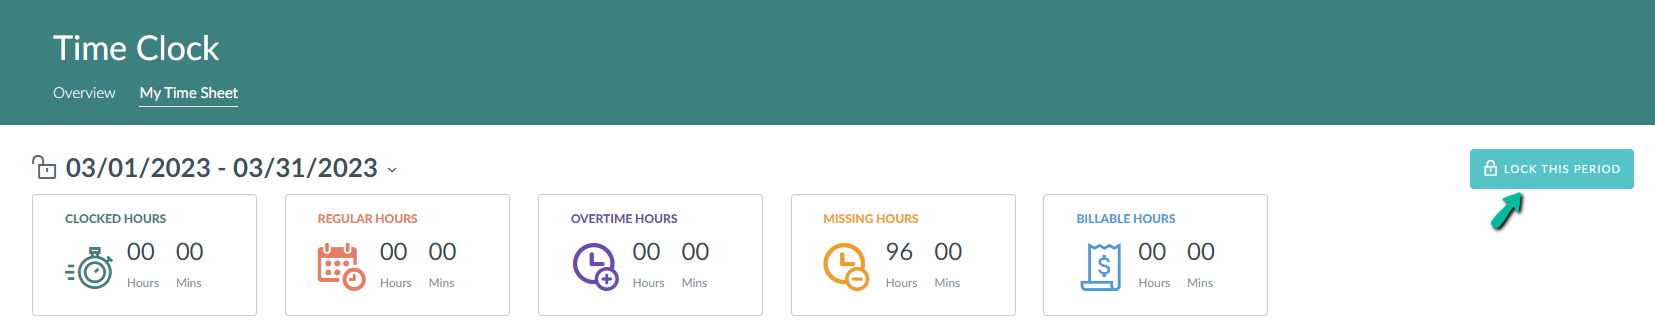
If you change tabs and click on “My Time Sheet”, you will be able to see a summary of the chosen month. Choose a month by clicking on the marked downward facing arrow. You can choose if you want to see clocked, regular, overtime, missing or billable hours by clicking on their buttons (marked green).
You can enter any record and see its details by clicking on the wanted date. That includes a summary and time details, with all the clock in instances, if there were more than one.
How to edit records inside of Time Sheet?
You will also get the option to Edit that specific record in the upper right corner. You can click on it if you wish to change any information or you can use a shortcut and find the wanted date and click the edit (pencil) icon on the far right, as shown below.
By selecting Edit, you will be able to change all clock in and clock out instances, as well as, add a new record if you forgot one. Do so by clicking on the +New Record tab.
Don’t forget to save your changes after you are done by clicking Save button on the top of the window.
Locking Pay Periods
Once you are sure that all the information for all the dates is correct, you can lock your input. Locking will ensure you cannot edit any records anymore.
A pop-up alert message will then appear and you will need to confirm your choice by clicking Yes. You can always opt out and click on Take me back.