Importing data into the system is the first step of setup. You can either create new records manually through the UI or import bulk data from .csv files into the solution.
The following steps show how to import employee data from a .csv file. Bulk data for departments, locations, divisions, etc. can be imported in a similar fashion. The import feature also allows you to start the onboarding process for the newly added employees and add corresponding data to other tables if it does not exist already. For example, when creating a record for an employee who works in the HR department, if a record corresponding to ‘HR’ is not found in the ‘departments’ table, it will automatically create one.
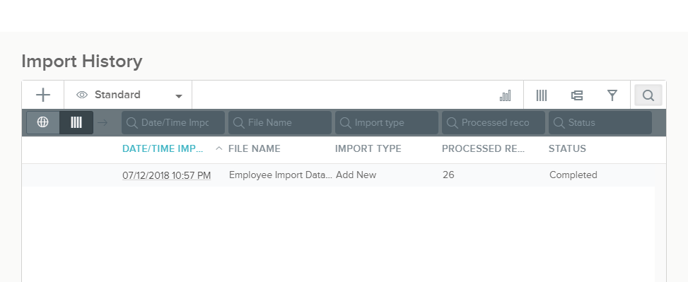
- Go to System Settings. Click on Import. ‘Import History’ page will be shown.
- Click on the ‘+’ icon on the top left to import a new file. It opens the import widget.
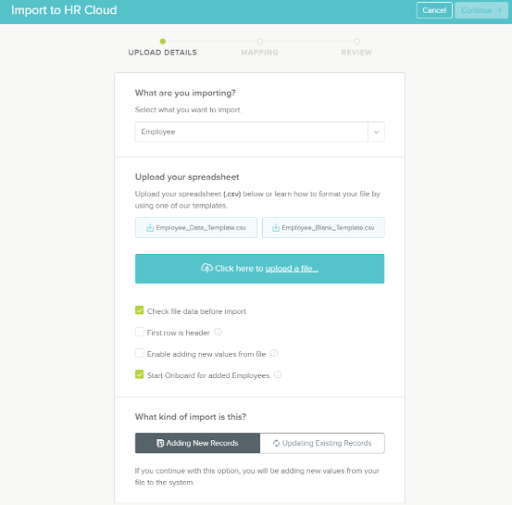
- Enter the upload details. Choose the object you're tying to upload records to, check the checkboxes you want, and choose whether you're importing (adding) new records or updating existing ones. Ensure that the .csv file format is as expected. A template is available in the import widget for reference. Upload the .csv file and click ‘Continue’ button.
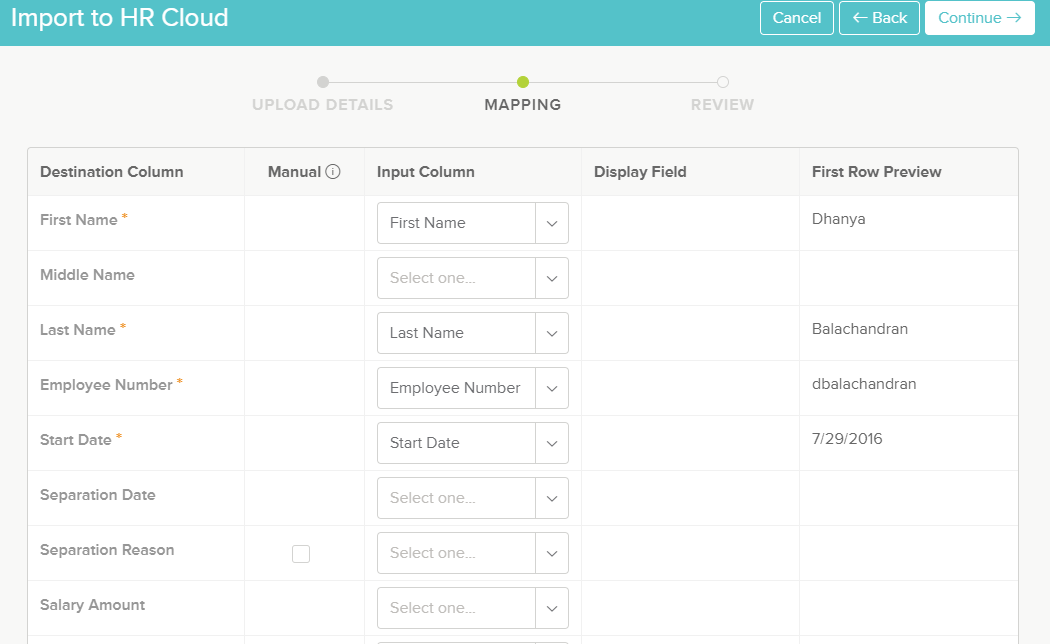
- The next step is to map the columns of the file to that of the entries in the system. If column headers are there in the file and the column names match the entry in the system then it is automatically mapped. Otherwise, you will need to map them manually. The mapping page is shown below.
- Once all the columns are mapped, click the ‘Preview’ button to see a preview of the imported data. Click ‘Continue’ if everything is correctly mapped.
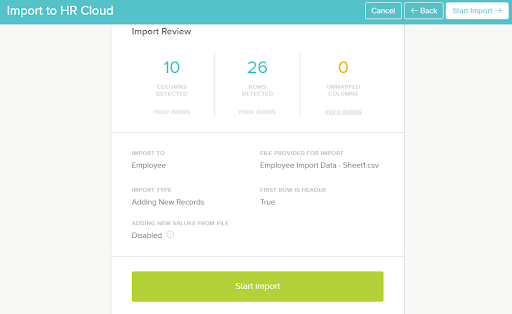
- The system then shows a review page of the import before actually importing the data. Click ‘Start Import’ to import the data into the system.
- In case of any errors in the file (unexpected values, incorrect format, etc,), the errors will be shown on this page.
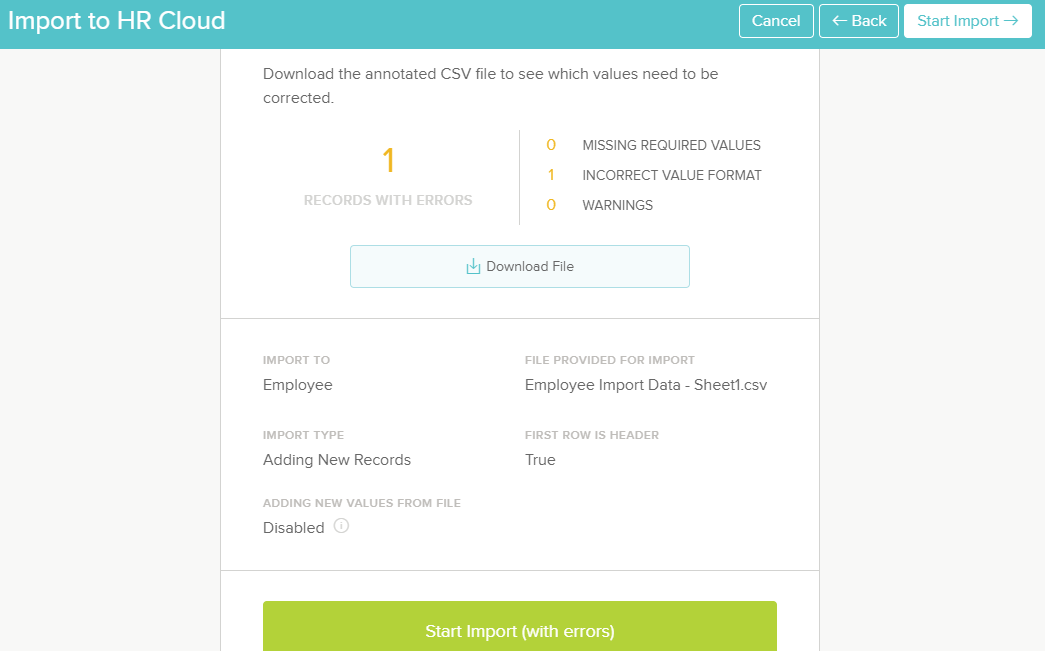
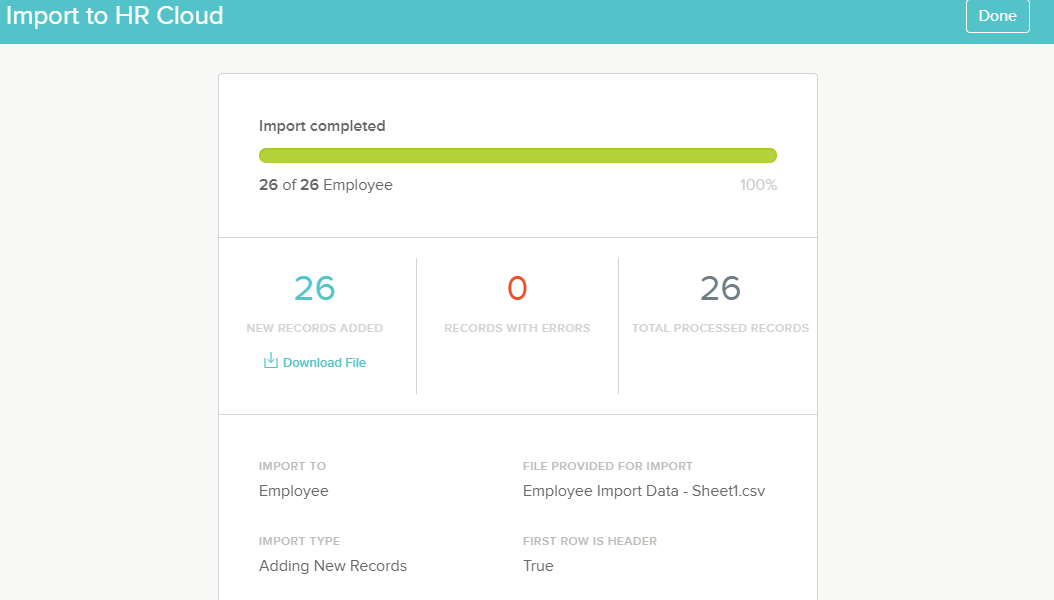
- To see the details of the error, click ‘Download File’ to download the error file. The first column of this file will show the failure reason. The system will still try to attempt importing data when you click ‘Start Import’.
- The import status is shown on the Import History page. It changes from ‘Starting’ to ‘Completed’ when the import is done.
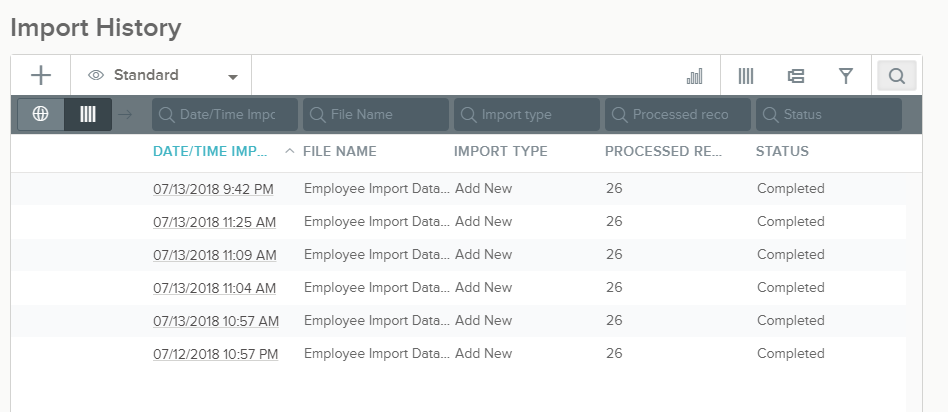
- To see the details of any import task, click on the record and its details will be shown.