Security Assertion Markup Language (SAML) is a standard for logging users into applications based on their sessions in another context. This single sign-on (SSO) login standard has significant advantages over logging in using a username/password:
-
No need to type in credentials
-
No need to remember and renew passwords
-
No weak passwords
Most organizations already know the identity of users because they are logged in to their Active Directory domain or intranet. It makes sense to use this information to log users in to other applications, such as web-based applications, and one of the more elegant ways of doing this is by using SAML.
How SAML works:
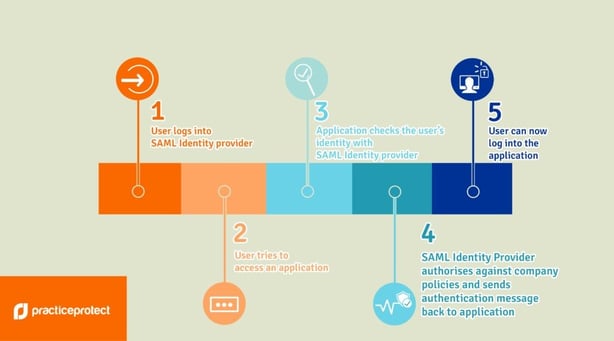
SAML SSO works by transferring the user’s identity from one place (the identity provider) to another (the service provider). This is done through an exchange of digitally signed XML documents.
Consider the following scenario: A user is logged into a system that acts as an identity provider. The user wants to log in to a remote application, such as a support or accounting application (the service provider). The following happens:
-
The user accesses the remote application using a link on an intranet, a bookmark, or similar, and the application loads.
-
The application identifies the user’s origin (by application subdomain, user IP address, or similar) and redirects the user back to the identity provider, asking for authentication. This is the authentication request.
-
The user either has an existing active browser session with the identity provider or establishes one by logging into the identity provider.
-
The identity provider builds the authentication response in the form of an XML document containing the user’s username or email address, signs it using an X.509 certificate, and posts this information to the service provider.
-
The service provider, which already knows the identity provider and has a certificate fingerprint, retrieves the authentication response and validates it using the certificate fingerprint.
-
The identity of the user is established and the user is provided with app access.
How SAML works (graphical):
Process:
SAML connection with HR Cloud
Information needed on your (client) side:
ACS URL: https://corehr.hrcloud.com/authentication/consume
-
Entity ID: https://corehr.hrcloud.com
-
Start URL: leave empty
-
Signed Response: leave unchecked
-
Name ID: Basic Information | Primary email
-
Name ID Format: Unspecified
What we (HR Cloud) need from you as a client:
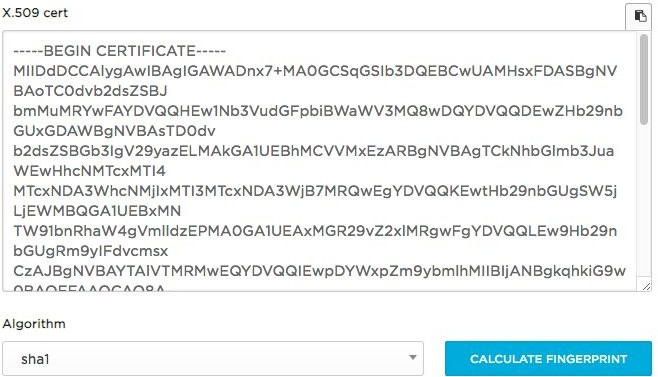
You need to deliver Public Certificate to HR Cloud Support
Example of Public Certificate:

Example with Google SAML configuration:
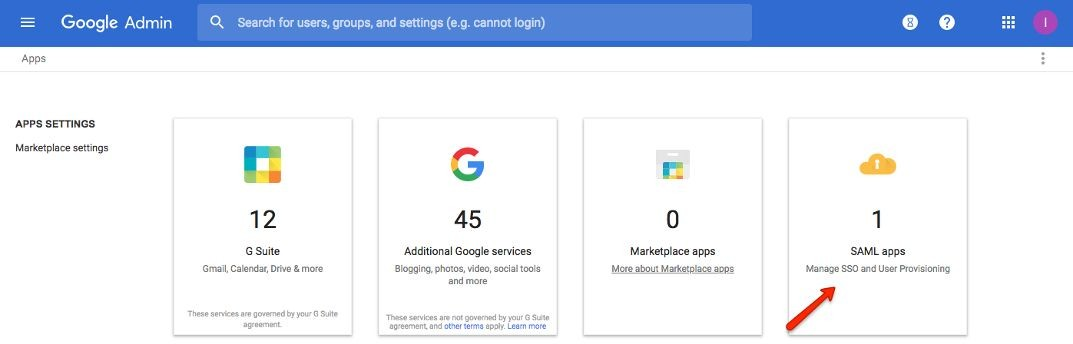
Step 1:
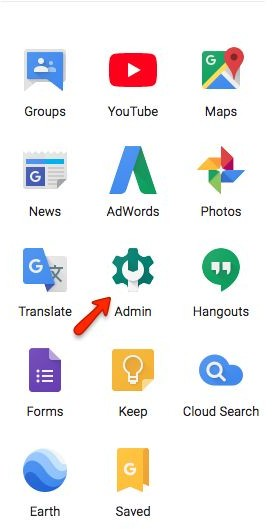
Log in to the Google Apps administration Console.
Step 2:
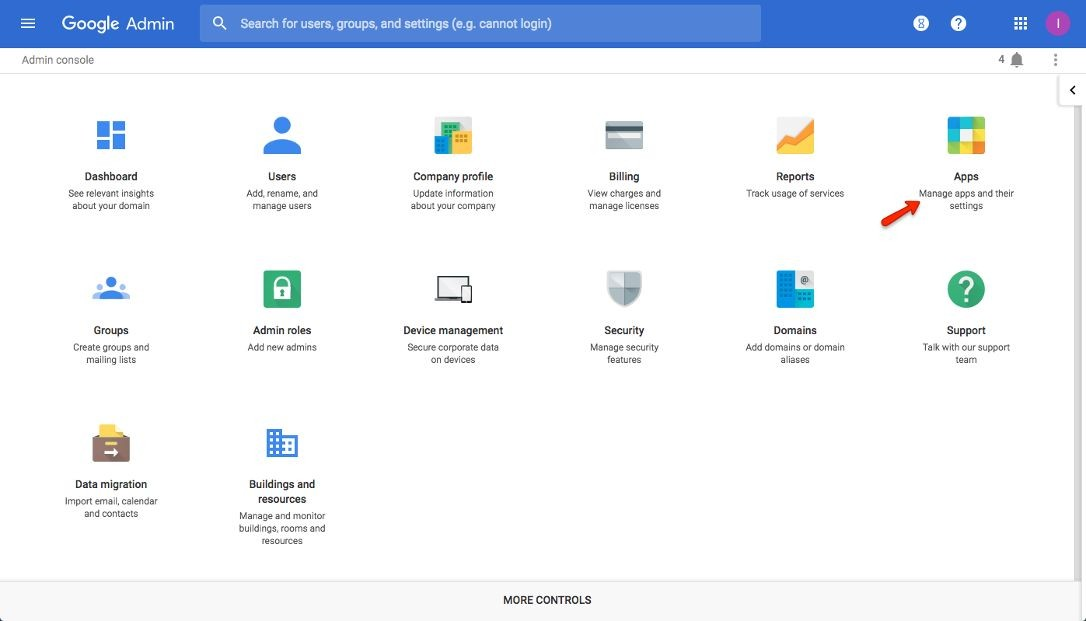
Click the Apps option.
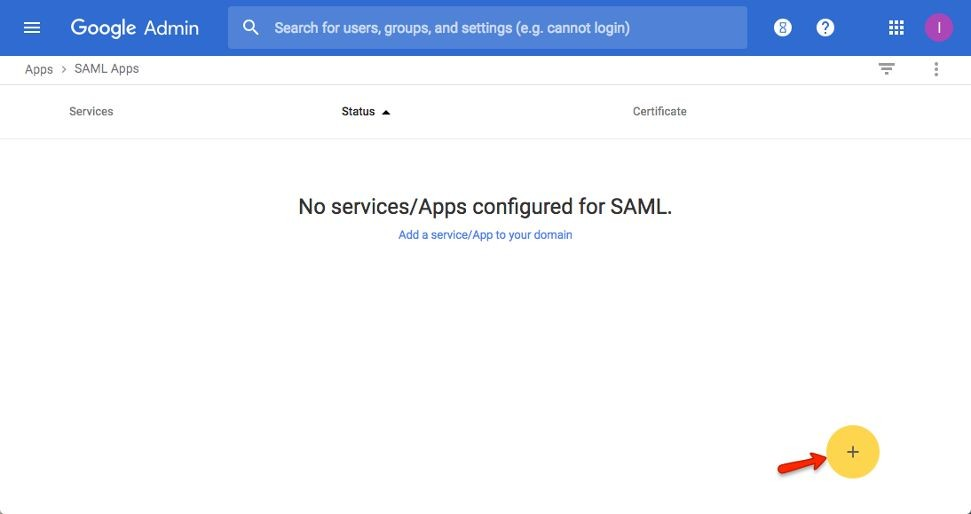
Step 3:
Click SAML Apps
Step 4:
Click the “+” icon in the bottom right
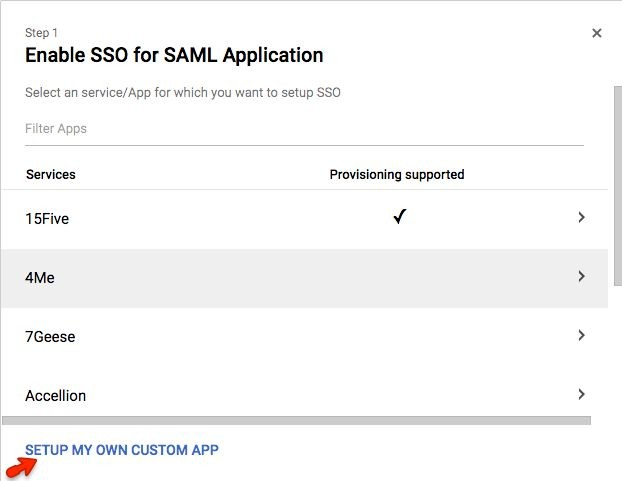
Step 5:
Click the “Setup My Own Custom App” link
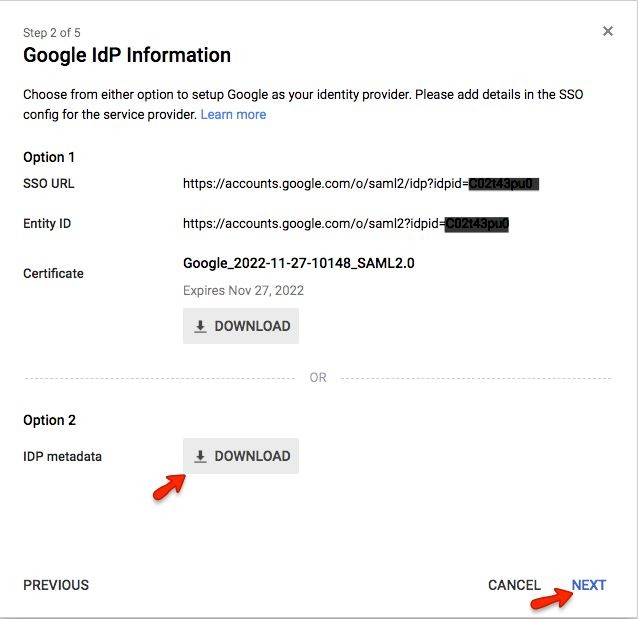
Step 6:
You will need the information on this screen for configuring SAML with HR Cloud.
-
Copy the Google “SSO URL” and paste it into the HR Cloud “Log On URL”
-
Copy the Google “Entity ID” and paste it into the HR Cloud “IdP Entity ID”
-
Download the link for Option 2 and save the metadata
-
Click “Next”
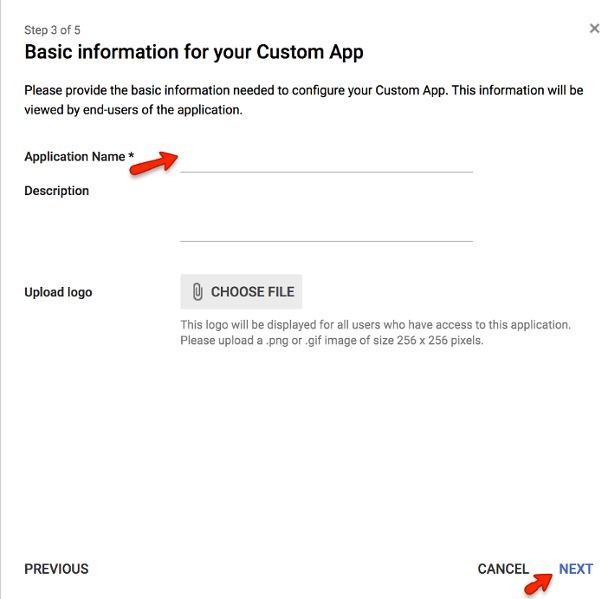
Step 7:
Basic Information for your Custom App
-
Enter “HR Cloud” for the “Application Name
-
Optionally add an icon for your HR Cloud App
-
Click “Next”
Step 8:
Enter service provider details
- Click “Next”
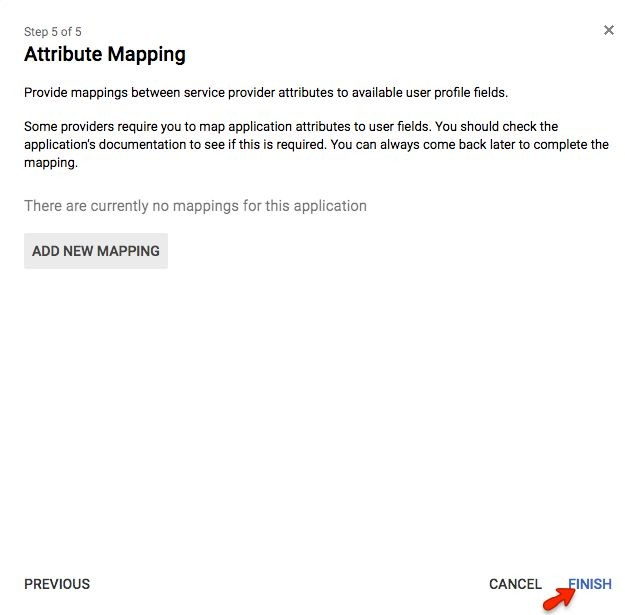
Step 9:
Click Finish
Step 10:
You have added the SAML App to Google Apps, but you also need to turn on the app for your users:
-
Click on "EDIT SERVICE" in the upper-right corner
-
Select “ON for everyone” and then click on "SAVE"
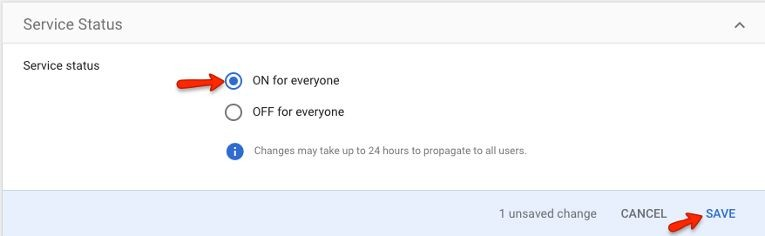
If everything went well then you should see HR Cloud under your google SAML Apps
IMPORTANT NOTE:
HR Cloud uses email as an identifier, so make sure to select it properly under NameID property Mapping.